How to Tell If Your Coffee Bloom Is Actually Working
The bloom step in pour-over brewing is easy to do wrong while looking right, and reading three specific signals tells you what your grounds are actually doing.
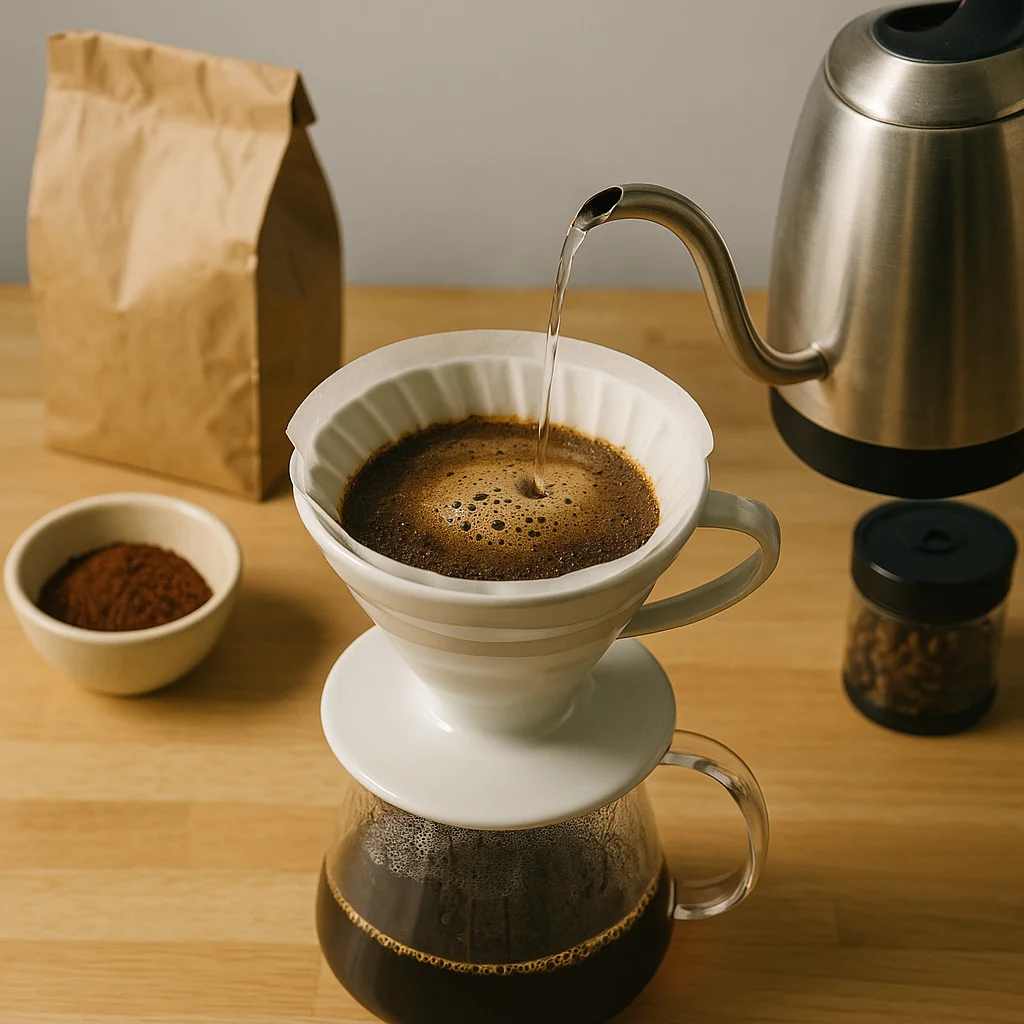
Most pour-over recipes include a bloom. You pour a small amount of hot water over your grounds, wait thirty seconds, then continue. It feels like a ritual, and after a few weeks it becomes automatic. The trouble is that automating it is exactly when it stops doing its job.
The bloom is not decoration. It is a degassing step. Fresh coffee beans release carbon dioxide gas that was trapped inside during roasting, and when that CO2 is still present in the grounds, it creates a physical barrier between the water and the coffee particles. Water has a hard time penetrating grounds that are actively venting gas, so extraction becomes uneven. The bloom gives those gases somewhere to go before your main pour begins.
The question worth asking is not whether you are blooming. It is whether your bloom is actually working.
What a productive bloom looks like
When you pour bloom water over grounds that still have meaningful CO2 inside them, the bed will rise, dome, and bubble. Not every bubble needs to be dramatic, but you should see visible movement. The surface of the grounds will look alive, almost like something is breathing underneath. In some cases, if the coffee is very fresh, the dome will rise noticeably and a few larger bubbles will push through the surface.
If your grounds sit flat and still after the bloom pour, that tells you something useful. Either the coffee has aged past the point where much CO2 remains, your water temperature is too low to trigger rapid degassing, or your dose is small relative to the bloom water volume. None of these is automatically a crisis, but each points toward a specific adjustment.
A flat bloom on very fresh coffee (roasted within the last week) is worth paying attention to. That would be unusual enough to suggest a water temperature problem or a bloom ratio problem, not a bean problem.
The bloom ratio matters more than most recipes admit
A common bloom instruction is to use twice your coffee dose in water. So if you are brewing with 20 grams of coffee, you bloom with 40 grams of water. That ratio works reasonably well as a starting point, but it is not universal.
If you use too little bloom water, the dry grounds in the center of your bed will not get wet at all. The CO2 trapped in those grounds will stay there. Your main pour will then hit partially dry, gas-laden grounds and the extraction will be uneven across the bed.
If you use too much bloom water, the water will pass through before the degassing phase has a chance to do anything meaningful. You will see some bubbling, but you will also be pushing water through before the grounds have had a chance to settle and release.
A practical range to experiment with is 2x to 3x your coffee dose, adjusted based on what you observe. If your bloom looks flat and your coffee is fresh, try going slightly higher on the ratio. If your bloom looks very active and your total brew time is running long, try the lower end.
The thirty-second rule is a guideline, not a law
Thirty seconds is a widely repeated bloom duration, and it works often enough that it has stuck around. But the right bloom time for your specific situation depends on how fresh your coffee is and how active the degassing looks.
For coffee roasted within the past two weeks, thirty to forty-five seconds is a reasonable window. The grounds are actively releasing gas and need a moment to settle before your main pour. For coffee that is four to six weeks past its roast date, the degassing has already happened in the bag, and a shorter bloom of fifteen to twenty seconds may be perfectly sufficient. The CO2 simply is not there in large amounts anymore.
A practical way to calibrate this is to watch the bloom surface rather than the clock. When the doming and bubbling visibly slows, that is often a better signal to continue than any fixed duration. If the bed is still actively moving at thirty seconds, waiting another ten or fifteen seconds is not going to hurt anything.
Pour technique during the bloom changes the result
How you apply the bloom water matters. If you pour quickly and aggressively, you risk pushing water through the grounds before they can swell and trap it. The bloom works partly because swollen grounds create a seal that holds the water in contact with the coffee. Aggressive pouring disrupts that.
A gentle, circular pour that starts in the center and works outward tends to saturate the grounds more evenly. The goal is to get every gram of coffee wet without driving water through the bed. If you pour too slowly from too high up, you get splashing that also disrupts even saturation. A low, steady pour with a gooseneck kettle is the classic approach for a reason.
One thing worth trying if you have never done it is to stir the grounds very gently with a spoon immediately after the bloom pour, just enough to make sure there are no dry pockets. Some brewers find this produces a more even main extraction, particularly with larger doses.
What a working bloom does to your final cup
A bloom that is functioning well tends to produce a cleaner, more even extraction. The flavors from the early part of your pour (bright, acidic, lighter) blend more smoothly with the later part (heavier, sweeter, more body). Without a working bloom, those phases can feel disconnected in the cup, with early notes that are sharp and late notes that drag.
This is not always obvious as a single dramatic difference, especially if you are not tasting with focused attention. But if you brew the same coffee for a few days with a deliberate bloom versus a minimal or skipped one, the comparison tends to be noticeable.
The bloom is one of the few steps in pour-over where small adjustments based on what you observe can produce consistent, real improvements. You do not need any extra equipment. You just need to watch what the grounds are telling you before you move on.