How to Brew Coffee When You're Grinding at the Right Setting but Your Grinder Keeps Stalling or Slowing Down
A grinder that struggles mid-dose is changing your grind consistency in ways that affect extraction, and three maintenance habits fix it reliably.
If your grinder sounded different this morning than it did six months ago, you probably noticed and moved on. The motor labors a little longer. The burrs seem to drag. You get your grounds eventually, so it feels like a minor annoyance rather than a real problem. But a grinder that slows or stalls during the grind is not just sluggish. It is producing grounds with more variation in size than when it ran cleanly, and that variation shows up in your cup as muddiness, bitterness, or inconsistency you cannot explain by adjusting your recipe.
Here is what is actually happening. Burr grinders work best when coffee feeds through at a steady pace and the burrs spin at a consistent speed. When the motor bogs down, the burrs slow momentarily, which means some particles spend more time between them than others. The result is a mix of finer and coarser particles in the same dose, even though your setting never moved. You can taste this as a cup that feels simultaneously over-extracted and thin, or one that tastes decent some mornings and off on others with no obvious reason.
Before assuming your grinder needs to be replaced, three things are worth checking. Most stalling and slowing problems come from one of them.
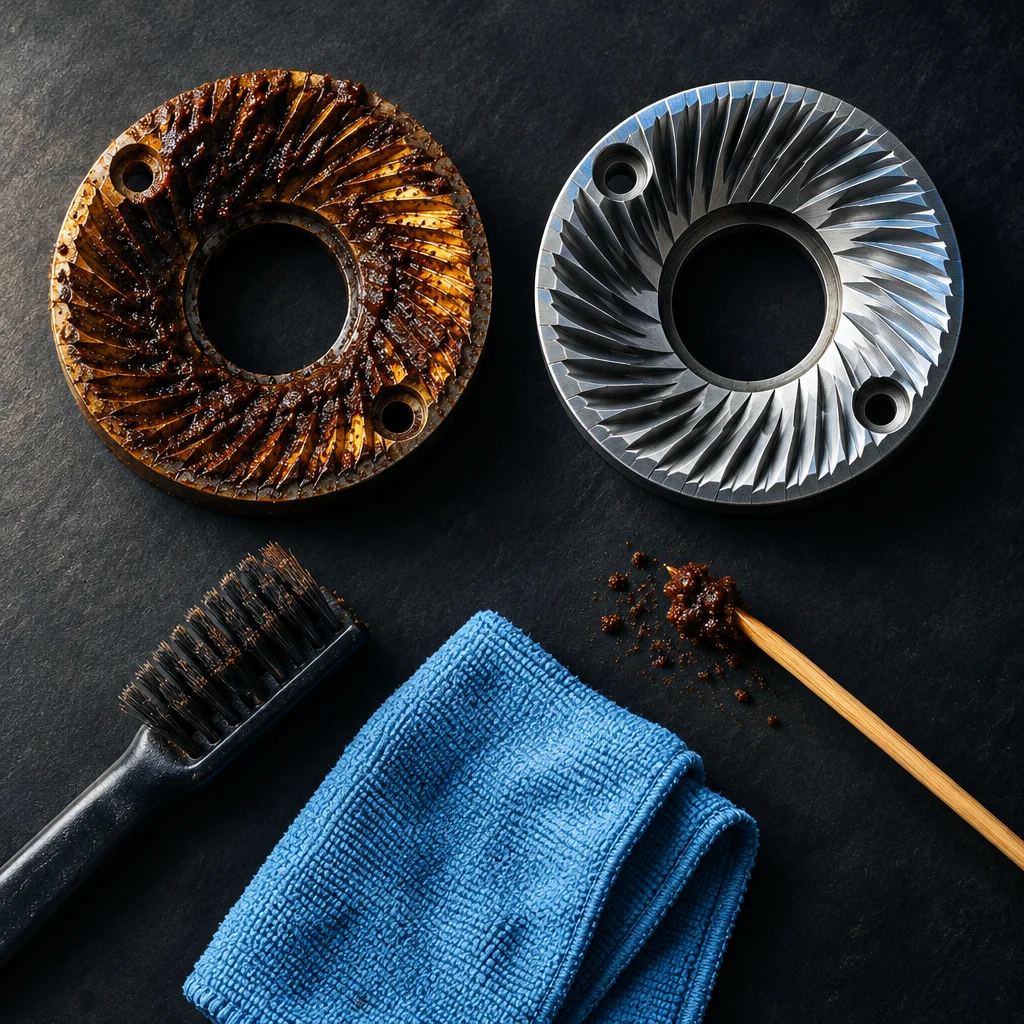
The burrs are coated in coffee oil buildup
This is the most common cause, and it is easy to overlook because the buildup happens gradually. Coffee beans contain natural oils, and those oils transfer to your burrs every single time you grind. Over weeks and months, a layer forms that is sticky enough to resist the coffee feeding through, which makes the motor work harder than it should.
The fix is cleaning the burrs. The specific method depends on your grinder model, but most home burr grinders allow you to remove the top burr by hand or with a simple tool that comes with the unit. Once it is out, use a stiff brush, like a small cleaning brush or even a toothbrush you have set aside for this purpose, to scrub both burr surfaces and the inside of the grinding chamber. You are looking for a brown, slightly waxy residue. Remove as much of it as you can.
For grinders where full disassembly is not practical, grinder cleaning tablets are a reasonable alternative. These are small compressed pellets you run through the grinder like coffee. They absorb oil and carry fine residue out with them. Run a small amount of coffee through afterward to clear any tablet residue before brewing.
How often you need to do this depends on how much you brew, but a general suggestion for home use is a brush cleaning every two to four weeks and a deeper clean every two to three months.
The hopper or chute has a blockage or static buildup
Sometimes the grinder is not stalling because of the burrs at all. The motor may be working fine, but coffee is not feeding into the burrs at a steady rate because something is slowing it upstream. Oily or dark-roasted beans tend to clump together in the hopper and form a small bridge over the opening, which starves the burrs of coffee intermittently and makes the grinder sound like it is straining.
The simplest check is to watch the hopper while grinding and see whether the beans are moving freely down toward the burrs. If they are sitting still or barely moving, give the hopper a gentle tap. If that releases a surge of beans and the grinder immediately sounds healthier, you have found your issue.
For static buildup, which is more common in dry climates or during winter, a small amount of water on your fingertip rubbed across the top bean or two in the hopper before grinding can reduce static enough to help beans feed more smoothly. This sounds odd but is a well-known technique among home grinders. Use barely any water, just enough to introduce a tiny bit of moisture.
The grind setting is too fine for what your grinder can handle
This one surprises people, but grinders have practical limits, and running them at their finest settings for extended periods puts real strain on the motor. If you recently moved to a finer setting, say for espresso or a finer pour-over, and the stalling started around the same time, that is a meaningful clue.
Finer grinds require more work from the burrs per gram of coffee because particles are spending more time being reduced. The motor has to work harder for the same dose. If your grinder is a budget or mid-range home model not specifically designed for espresso, it may genuinely struggle at its finest settings, especially with harder beans or a larger dose.
If you suspect this is the case, try reducing your dose by a gram or two and see whether the stalling improves. If your recipe depends on that dose, grinding in two smaller batches rather than one full dose can also reduce strain significantly. It takes an extra minute but is gentler on the motor.
A note on when cleaning does not help
If you have cleaned the burrs thoroughly, confirmed the hopper feeds freely, and your grind setting is reasonable for the grinder, and the motor is still noticeably slower or louder than it used to be, the motor itself may be wearing out. Home grinders do have a lifespan. This is not a reason to panic, but it is worth acknowledging. A motor that is genuinely degrading will produce increasingly inconsistent results regardless of what you adjust elsewhere.
The practical takeaway is that cleaning fixes most stalling problems, and doing it regularly means you are unlikely to reach the point where you are troubleshooting at all. A grinder that sounds healthy and feeds coffee smoothly is producing grounds that match your setting, which means your recipe adjustments are actually doing what you think they are. That consistency is what makes the difference between a cup that is reliably good and one that keeps surprising you in ways you cannot trace back to anything obvious.